
Power zones are at the core of cycling training, but what exactly are they? This post explains how power zones are used to create effective cycling training plans. After reading this post, you will know how to discover what your FTP is, and how to use this knowledge to do a cycling training plan based on power zones. Regardless of your current cycling level, a cycling training plan based on the science of exercise physiology will enable you to get fitter and faster as quickly and efficiently as possible.


Do you want to get fitter and faster, but you find cycling training plans confusing? Are you puzzled by the multi-colored graphs that pop up when you click on a potential training plan? Don’t worry, because in this post, all is explained. We explain what power zones are, how to figure out your own power zones, and how to use this knowledge to get the maximum and fastest benefit from your cycling training. By the time you have absorbed this post, you will be able to glance at a workout and instantly assess it, and know whether it makes sense for you. Trust us – you will see much faster improvement when you apply the science of exercise physiology to get the maximum improvement for every hour on your bike.
Related Post: 7 Reasons to Use a Power Meter
What Are Power Zones in Cycling?
Basically, power zones are intensities of cycling that directly relate to your level of cardiac effort and the associated metabolic response of your body. By “metabolic response,” we mean how your body fuels the ride. Your body has a choice of using oxygen, fat or glucose when you exercise, and the fuel sources it uses correlate to your power zones.
Why Should You Use Power Zones for Cycling Training?
Using power zones ensures that you get maximum value from the effort you expend. This is easier to understand if you compare it to a gym workout. Most of us would agree that a useful gym workout would involve going into a gym and then following a program of planned power expenditure. For example, start with 10 sets of bench presses with a weight of 150 pounds. Repeat 3 times. Then move onto a shoulder press using dumbbells weighing 15 pounds each. And so on. The alternative would be to just wander into the gym and randomly lift whatever weights happened to be lying around, while making your way in the general direction of the snack bar.
Undoubtedly, the first approach would pay bigger dividends in developing your physique and strength. Plus, you could then gradually increase your strength and grow your muscles by lifting progressively heavier weights.
In the same way, carefully planned cycling based on power expenditure and how long you maintain that power expenditure will have more effect than just getting on your bike and randomly pedaling at whatever speed you feel like towards the nearest coffee shop. And planned training enables you to gradually increase your speed and cycling fitness.


Newbie Gains in Cycling Fitness
The exception is something known as newbie gains. If you are brand new to working out, then for the first little while, pretty much any exercise in the gym is going to result in strength and muscle gains. However, after the first few months, you do have to get more structured.
The same is true of cycling. If you just bought your first bike five minutes ago, you will in fact make substantial speed and fitness gains just by riding it. As randomly as you like. However, after a few months, these gains will start to decrease. At some point, you are going to need structured workouts to continue to improve. And that is where structured training based on power zones becomes essential.
Related Post: Can Average Cyclists Do Zwift Workouts?
Progressive Overload
In order to work, structured training in both body building and cycling requires the same principle – progressive overload. In the gym, you add more weight, or lift the same weight more times. Pretty simple. However, how do you know you are progressively overloading on a bike? Well, on the one hand, it’s pretty simple. A one-hour ride is obviously more demanding than a five-minute ride.
However, duration is just half the story. The other half of the story is power. How much power are you putting out as you push down on those pedals? How much lung power are you expending as you pedal harder and cycle faster?
It used to be that we estimated this by measuring how hard our hearts were working. And you can still do that, and it is still a useful metric. However, heart rates are variable, depending on multiple factors. Also, when you start applying more power to the pedals, it takes many seconds before your heart rate starts to accelerate. That is, heart rate is a lagging measure.
The Power of Power Meters
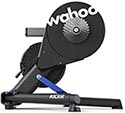
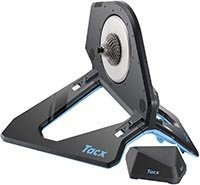
Luckily, cyclists can use a measure that is not available in sports such as swimming and running – we have power meters. These can be purchased independently, and they are also built into most smart trainers. The great thing about power meters is that they record objective and reliable measures. It doesn’t matter how you feel or what the weather is like. Forty watts of power is always very low power, and 500 watts of power is always awesome power. And being able to maintain 300 watts of power over a sustained time period is always an infallible sign that you are in great cycling shape.
What is FTP or Functional Threshold Power?
FTP or Functional Threshold Power is effectively a measure of the power you can hold cycling for an hour, measured in watts. At just above that power, you will not be able to maintain. But if you pace yourself just below that power, you should be able to keep going.
Exercise physiologist Andy Coggan is the scientist we have to thank for the science of FTP. He defined FTP as “the highest power that a rider can maintain in a quasi-steady state without fatiguing for approximately one hour. When power exceeds FTP, fatigue will occur much sooner, whereas a power just below FTP can be maintained considerably longer.”
What are Watts per Hour (W/kg)?
Just to make things a little more complicated, you will sometimes see FTP expressed as, say, 200 watts, and other times see it expressed as 2 W/kg (watts per kg). Watts per kg is simply your FTP power divided by your weight. In other words, W/kg is your power to weight ratio.
This makes more sense if we look at an example. Let’s say we have two cyclists each producing 200 watts of power as they cycle. You might think they would be going at the same speed. However, what if Cyclist A is Lucy, weighing 50 kg, and Cyclist B is Clyde, weighing 100 kg? Obviously, Lucy will be leaving Clyde in the dust, because she has less weight to propel forward. For the same reason, you can make a 20-pound bike move fast by pedaling, but you cannot pedal a 5-ton car. You just don’t have enough power in your legs relative to the weight of the car.
The importance of the power to weight ratio is precisely why W/kg is such an essential metric. Lucy’s W/kg is 200 divided by 50, so she is cycling at a power level of 4 W/kg. That’s excellent and will result in her cycling at a very respectable level. Meanwhile, Clyde’s W/kg is 200 divided by 100, so he is cycling at a power level of 2 w/kg. That’s not embarrassing, but he will not be able to keep up with Lucy.
As you train, you will find yourself constantly keeping an eye on your W/kg. Most cycling apps will show it to you all the time. It is exhilarating to watch as it improves.
What is Lactate Threshold?
Your FTP is also your lactate threshold. If you are cycling above your FTP, your body will start to be unable to clear the lactate that is generated by cycling. An accumulation of lactate causes burning pain, and makes you want to stop cycling. And for good reason, because that burning pain signifies that your muscles are breaking down.
On a training ride, you might be above the threshold for a short time, and then slow down for a while to clear the lactate. And then repeat.
Why Do You Need to Know Your FTP?
The point of knowing your FTP is that it enables you to figure out the correct power zones at which to pace yourself while training, so as to maximize your gains.
For example, for endurance you are going to want to train in a power zone below FTP, and for power and strength you are going to want to include some periods of training above FTP. Obviously, these periods are going to have to be shorter than the periods when you are training below FTP.


Most commercial and free training plans, such as those offered by TrainingPeaks and Zwift, are based on your own personal FTP. Plugging your FTP into those applications enables them to to generate a training plan that is customized to your fitness level. It’s like having your own personal coach (almost), except way cheaper.
First, Find Your Baseline. How Powerful Are You?
First, you need to find out how powerful you are at cycling right now, and use this as a baseline. This means you have to determine your current FTP.
If you are regularly riding on a platform such as Zwift, the program will do its best to estimate your FTP, based on your performance. And if you are regularly using a power meter, you will have a pretty good idea of the kind of power you can sustain.
However, these are estimates. You really need to be as precise as possible, because that will ensure that your training program is as laser-focused as possible.
Ways to Measure Your FTP
If money is no object, you can just head down to your nearest state-of-the-art exercise physiology laboratory and get yourself tested. However, as this will usually cost a huge amount of money, most of us will not do this. And even if you could afford it, would you really want to go to a lab to be tested once a month?
So, let’s just ignore this option and look at some more realistic options. There are many ways to measure your FTP, as long as you have a bike and a power meter. Most smart trainers have power meters built into them.


Basically, you can choose from ramp tests and sustained effort tests.
Ramp Tests
These are the shortest and least demanding tests. They are increasingly being regarded as the gold standard of self-testing your FTP. And they just happen to be the ones I prefer, because they are easier to do. You need a program such as Zwift or TrainingPeaks or TrainerRoad to do it. Preferably, you need a smart bike trainer that has ERG mode. Of course, it has to have a power meter built in, or you have to have a power meter as an add-on.
Basically, the program will step you through warming up for at least 5 minutes. After that, you cycle at 100 watts for one minute, then you go to 120 watts for one minute, and so on.
Based on your performance, the program will instantly calculate your current FTP. It will estimate it as about 75% of the last segment you completed. If you don’t have Zwift or TrainingPeaks or TrainerRoad, you can use an online calculator to do your own calculations, based on your performance. But really, those apps are so much easier, and very affordable, in our opinion, for what they give you.
TrainerRoad is said to offer the best Ramp Testing. It bases it on your previous FTP, so it is not so cookie cutter. However, you can get a good ramp test from other programs as well.
Zwift offers a light version of a ramp test, in which the jumps are only 10 watts, as opposed to 20 watts. This is a much better version for newer cyclists, who will often find a 20-watt jump just too much. These tests are also better suited to lighter cyclists, who are likely to have lower power levels than heavier cyclists.
Sustained Effort FTP Tests
There are two basic kinds of sustained effort FTP tests. One of these requires that you do two eight-minute intervals in which you cycle as hard as you can for the full eight minutes. Then the program will calculate 90 per cent of the average of those two eight-minute intervals.
The other kind of sustained effort FTP test is a twenty-minute test. This was the original test, and it remains the most popular test. It is also considered the most reliable test. You only have to do one interval, but you have to sustain it for twenty minutes. The program then rates your FTP at 95% of the power you maintained through that 20 minutes, to estimate what your sustained power output could be for one hour.
Personally, if I have to choose one of the two, I will always go for the two eight-minutes version, because I find it really hard to pace myself through a twenty-minute test. However, if you are good at pacing yourself, the twenty-minute test is an excellent method of testing FTP.
Once You Have Your FTP
Once your FTP is established, you are ready to start training scientifically. Whatever software you are using can now figure out how much power you need to put out to be in the various training power zones.
For example, say you have an FTP of 100. (This is low, but it is an easy number to do math with!) Your training software knows that in order to cycle in zone 3, for example, you need to cycle at 75 to 85% of your FTP. Therefore, with your FTP of 100, you will need to cycle at between 75 and 85 Watts in order to be in Zone 3.
Most workouts will have you cycling for a period of time above your lactate threshold (in this case, above 100 watts), then dropping down in power to clear out the lactate, and then ramping it up again. A good training workout will mix and match the various training zones in such a way as to give your body a good training effect and stimulate increases in fitness.
Next, let’s take a look at these training power zones. The chart summarizes the most important things to know about the power zones.
The Power Zones for Cycling Training
| Zone 1 | Recovery (Grey in Zwift) | 1 to 58% of FTP | 55 to 65% of your maximum heart rate | So easy you would hardly even call it exercise. You can do whatever you like, such as watch a movie, or chat on your phone | Mainly fat and oxygen | Sometimes used as a complete workout on recovery days. This zone typically shows up in warmups and cool downs. It can also show up in between hard efforts, giving you a chance to clear lactate. It will usually be less than an hour. You will not gain any fitness when cycling at this level. But you will lay the foundation to be strong enough to build fitness the next day. | Rest is always good for your health. In terms of fitness, you will not gain any. However, you will get the rest and recovery you need to get fitter the next day. |
| Zone 2 | Endurance/Aerobic (Blue in Zwift) | 59 to 75% of FTP | 65 to 75% of your maximum heart rate | You know you are exercising, but it is comfortable. You can still talk quite comfortably most of the time. So you could chat on the phone. You could still watch a movie, but you might be a bit distracted | Mainly fat and oxygen, plus a small amount of carbs | Here you will build your base miles. You will spend a lot of time here, especially in the beginning. | Build mitochondrial density. Very likely extend your life and protect you against all-causes of mortality. Also build aerobic fitness. In the early days of training, a lot of time in this zone will build the foundation of your later cycling success. You can continue building this fitness base for decades. |
| Zone 3 | Tempo (Green in Zwift) | 75 to 85% of FTP | 80 to 85% of your maximum heart rate | It's a brisk and challenging pace, but not so hard that you will break down. You are starting to feel tired in this zone. You can spend quite a bit of time here, but you have to concentrate. You can converse, but you probably won’t want to. | Glucose, fat and oxygen. You will need to ingest more sugars for this zone, and subsequent zones | This zone has a bit of a bad rep, because a lot of people doing unstructured training spend all their time here. But in fact it does not build the base as well as Zone 2, and it is not all-out enough to really build your high-end capacity (this requires higher zones). But is still has a place in a structured training plan. Use it for high cadence or low torque drills. Don’t spend too much time here. | You need to learn to recover here, because when you are racing or on a group ride, you need to be able to recover here, as you will be dropped if you go back to Zone 1. |
| Zone 3 Plus | Still tempo, but this sliver is called the Sweet Spot (still Green) | 85 to 95% of FTP | 80 to 85% of your maximum heart rate | This is a tough zone and you won't want to do much except concentrate on staying in it | Glucose, fat and oxygen | This is a well balanced training zone that does you good on multiple levels. You can come back to this zone repeatedly, for short periods, because it is not putting too much demand on your body | It is a way to build your threshold from the bottom end of threshold, so it is not too taxing. |
| Zone 4 | Threshold (Yellow in Zwift) | 95 to 105% of FTP | 85 to 89% of your maximum heart rate | This is tough, and it is starting to hurt. Your legs will quickly start to feel tired in this zone. You can say a few words here, but you probably will not want to. In this zone and above, you need your full concentration on your cycling | Glucose (primary), plus fat and oxygen | This is a slim sliver of a power zone that is never easy. But it is Important to work on this. It is where you will be a lot in races and group rides. Most people, including cycling pros, cannot hold 100% of FTP for an hour. This is because it’s not just about power, it’s also about athletic, muscular and aerobic ability as well. And you don’t HAVE to be able to do it, either. | Training in this zone can lead to rapid fitness zones, but it should not be over-used. |
| Zone 5 (and 6 and 7) | Vo2 Max, or Maximal Aerobic Power (Orange in Zwift; Red when you get to Zones 6 and 7) | 105% Plus of FTP | 90% and above of your maximum heart rate | You are exercising as hard as you can. Talking is out of the question. Think of starting a race, or finishing one. This is not your happy place. Your legs will start burning quickly. Most people can only hold this for 3 to 8 minutes | Glucose | Zones 5, 6 and 7 are Usually lumped together. You might be able to hold Zone 5 for 3 to 5 minutes. In Zone 6 you might be able to last for 30 seconds to 3 minutes, at the end of a race perhaps. Zone 7 draws on neuromuscular power. Your brain forces your muscles to do it, until failure. It is basically sprint level power that you can only sustain for just a few seconds. | These zones use fast-twitch muscle fibers. The best you can do is learn to be able to repeat this more than once during a given race. Here, you are building your FTP up from the top (as opposed to the Sweet Spot, where you are building it up from the bottom). |
How Training Plans Based on Power Zones Work
All cycling training plans work on the same training principles. For the purposes of this explanation, let’s assume you are using a training program in Zwift. You will first determine your current FTP, using a Zwift test (or simply input it, if you happen to know it). Then, you choose a training program, for example, something to build endurance. Zwift then generates a training program based on percentages of your FTP. A training program for endurance would have you spend a lot of time in Zone 2. So, it would include a lot of time spent at 59 to 75% of your current FTP.
As you can see, using a percentage of your own FTP means that every training program you do is customized to your current level of power and fitness. As such, it is an excellent way to ensure that you can manage to do the training plan, and that it will benefit you.

 Here is a Zwift workout that includes almost all of the power zones. Grey = Zone 1; Blue = Zone 2; Green = Zone 3; Yellow = Zone 4; Orange = Zone 5; Red = Zone 6. Notice for example that Zone 1 (grey) is used to warm up and to cool down. Notice how the color bars get narrower as the colors indicate more intense zones. Once you know the colors, it is easy to assess a training workout at a glance
Find a Cycling Training Plan and Get Going!
Knowing your FTP, and understanding how cycling training plans based on FTP work, will open the doors to a world of possible training plans. You can choose to sign up for Zwift or Strava or TrainingPeaks or TrainerRoad, choose a training plan, and off you go!
Keep Checking Your FTP
Measure your FTP every four weeks to track progress. If the number goes up, you should have become fitter. The ideal scenario would be if your FTP number goes up while your weight decreases, and you notice that your heart rate to produce that same level of power is lower. That would mean that your power in terms of W/kg is higher, and your aerobic fitness has increased.
Those kinds of multiple gains are more likely to occur when you are a newbie. However, you can expect a gradual increase in FTP for a very long time, providing you keep training.
Good luck to you with your training plan!
Check Out Our Most Popular Posts! | ||
| ||
Did you enjoy this post or find it helpful? If so, please support our blog! We write this blog because we love cycling. But we also need to earn a living, so we would appreciate it very much if you click through to one of our reputable affiliates for your online shopping. We are proudly affiliated with Amazon, which sells pretty much everything, and has outstanding shipping and return policies. When you buy from our affiliates we make a small commission, and this is the only way we earn any income. Plus, it costs you nothing at all - a real win/win situation! We here at Average Joe Cyclist do not receive any information AT ALL about who you are, where you live, or what your dog's name is. Buying through our Amazon links is simply an anonymous way to thank us for our efforts, like tossing a few coins in a tip jar. Except that it is Amazon who tosses the coins, not you! | ||
")


")
")


")
")
")

")


")
")


")


