
In our previous post about curing and preventing the Piriformis Syndrome, we explained that it is essential to have a balanced stretching and exercise program to avoid this painful condition. As promised, here is a exercise program designed to help people recover from Piriformis Syndrome and prevent recurrence when returning to cycling. It consists of targeted exercises to stretch and strengthen the piriformis muscle, other gluteal muscles, and the external rotators.
In case you missed the previous post: Piriformis Syndrome is a neuromuscular condition where the piriformis muscle/s in the buttock/s become inflamed and compress the sciatic nerve, causing pain, tingling, or numbness in the buttocks and down the leg. It is common in cyclists.
The stretching and exercise program is divided into two groups: stretches (to improve flexibility and mobility) and strengthening exercises (to build resilience and balance in the hip and gluteal muscles).
 |  |
 |  |
Related Post: Piriformis Syndrome in Cyclists – How to Prevent and Cure It
Related Post: A Step-by-step Guide to Returning to Cycling After Severe Piriformis Syndrome
Part 1: Stretching Exercises for Piriformis Syndrome in Cyclists
These exercises will help release tension in the piriformis, glutes, and surrounding muscles, improving hip mobility. They are demonstrated by fitness coach Wendy Orsten.
As with all stretching workouts, be gentle with yourself. Go slowly, and stop immediately if you feel pain. Never bounce. Rather, relax into the stretch. Breath slowly, feel the stretch, and then see if you can go a little deeper into the stretch – slowly.
1. Piriformis Stretch (Seated or Supine Figure 4 Stretch)

 The Piriformis Stretch (Seated or Supine Figure 4 Stretch) targets your glutes, hips, and piriformis muscle
How to do it:
- Sit on a chair or lie on your back.
- Cross one leg over the opposite knee, forming a figure 4.
- If seated, gently lean forward; if lying down, pull your bottom leg toward your chest.
- Hold for 30 seconds, repeat 3 times per side.
2. Hip Flexor Stretch (Lunge Stretch)

 The Hip Flexor Stretch (Lunge Stretch) stretches your hip flexors, glutes, quadriceps, and inner thighs. It can also help improve your flexibility
How to do it:
- Kneel on one knee with the other foot forward in a lunge position.
- Push your hips forward while keeping your torso upright.
- Hold for 30 seconds, repeat 3 times per side.
3. Glute Stretch (Knee-to-Chest Stretch)

 The Glute Stretch (Knee-to-Chest Stretch) will stretch your glutes, hip flexors, lower back, and hamstrings
How to do it:
- Lie on your back and pull one knee to your chest while keeping the other leg extended.
- Hold for 30 seconds, repeat 3 times per side.
Variation that gives the hips an additional stretch:
- Lie on your back and pull your knee towards the opposite shoulder, while keeping the other leg extended.
- Hold for 30 seconds, repeat 3 times per side.
4. Hamstring Stretch (Seated or Standing)

 Hamstring Stretch (Seated or Standing)
How to do it:
- Sit with one leg extended and the other bent.
- Reach toward your toes, keeping your back straight.
- If you do this one standing, keep both legs straight, while keeping your knees soft.
- Alternatively, stand up and put your foot on a chair, keeping your leg straight. Press gently down on your leg and you will feel a stretch in your hamstrings.
- Hold for 30 seconds, repeat 3 times per side.
5. Leg, Hip and Glute Stretch

 Leg, Hip and Glute Stretch. As you reach down towards your foot, you should feel a stretch in most of the muscles of the lower body. In particular, you should feel a stretch in your outer thigh
How to do it:
- Cross one foot over the other.
- Slowly reach down towards your front foot, going as far as you comfortably can.
- Hold for 30 seconds, repeat 3 times per side.
Related Post: Returning to Cycling and Swimming after Severe Piriformis Syndrome: A Step-by-Step Plan
 | |  |
Part 2: Strengthening Exercises for Piriformis Syndrome in Cyclists
These exercises focus on building strength in the hip abductors, adductors, and gluteal muscles to maintain balance and stability. Don’t start with strength building until the irritation in your piriformis has healed completely, so that you no longer have any pain.
1. Clamshells (Gluteus Medius and Maximus Activation)

 Clamshells for activation of the Gluteus Medius and Maximus
How to do it:
- Lie on your side with your knees bent at 90 degrees and feet together.
- Put the hand of your upper arm on the floor in front of you, leaning slightly on that arm. This will keep your hips at the right angle for maximum benefit from the exercise.
- Keeping your feet touching, lift the top knee as high as possible without rotating your hips.
- Lower slowly.
- Perform 3 sets of 15 reps per side.
- As you progress, you can make this exercise more challenging by looping an elastic resistance band around your legs.

 As you progress, you can make clamshells more challenging by looping an elastic resistance band around your legs
2. Side-Lying Hip Abduction

 Side-Lying Hip Abduction
How to do it:
- Lie on your side with the bottom leg bent and the top leg straight.
- Lift your top leg up, keeping it straight.
- Lower slowly. Perform 3 sets of 12 reps per side.
3. Hip Bridges (Glute Bridges)

 Hip Bridges (Glute Bridges) target your glutes, hamstrings, and core muscles.
How to do it:
- Lie on your back with knees bent and feet flat on the floor.
- Push through your heels to lift your hips, squeezing your glutes at the top.
- Lower slowly. Perform 3 sets of 15 reps.
4. Side Steps with Resistance Band

 Side Steps with Resistance Band. As shown in these photographs, you will step your way across the floor, sideways
How to do it:
- Place a resistance band around your thighs.
- Stand with feet hip-width apart and squat slightly.
- Step to the side, maintaining resistance.
- Perform 3 sets of 15 steps in each direction.
5. Single-Leg Deadlifts (Balance and Strength)

 Single-Leg Deadlifts for Balance and Strength
How to do it:
- Stand on one leg and hinge forward at the hips, reaching toward the floor while extending the opposite leg back.
- Engage your glutes and core to return to standing.
- Perform 3 sets of 10 reps per side.
| |
 | 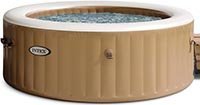 |
Relax Once You Are Done
If you can follow these stretches and exercises up with a relaxing soak and massage in a hot tub, so much the better! This has become my favorite strategy for trying to prevent another outbreak of Piriformis Syndrome.
Returning to Cycling
Once you have done the above exercises for a week or two, and you are out of pain, it is time to start getting back on your bike. (But keep doing the exercises as well!) First, ensure that you have a perfect bike fit, so that you do not injure yourself again. If you don’t want to pay for a professional bike fit, either use an AI app like MyVeloFit, or use the book below to fit your bike yourself.


At the very least, ensure that your saddle is fitted correctly. This is the single most important thing to prevent injury while cycling. Read our post on how to perfect your saddle height, setback, and tilt.
Relax and Massage the Gluteus Muscles and Hip Flexors after a long Bike Ride
Once you start cycling, take good care of yourself to prevent a relapse. After a long ride, it is very useful to relax and massage the gluteal muscles and the hip flexors. This will bring blood flow to the area, and help to prevent your tired muscles from going into painful contractions. You can do it with a tennis ball or with a foam roller.
Use a Tennis Ball to Relax and Massage the Gluteus Muscles

 You can use a tennis ball to massage your glutes against a wall
How to do it:
- Stand with your back against a wall.
- Place a tennis ball about a hand’s width below your waist.
- Make small circular movements, applying gentle pressure between your buttock and the tennis ball.
Use a Foam Roller to Relax and Massage the Gluteal Muscles, Hip Flexors and Hamstrings
The Gluteal Muscles

 You can use a foam roller to relax and massage your gluteal muscles
How to do it:
- Put a foam roller on the ground and sit on it with one buttock.
- Roll around gently.
- You can increase the pressure by bending your knees and then putting one ankle on top of the opposite knee. This will increase the pressure on the piriformis in the buttock of the raised leg.
Repeat on both sides, of course.
The Hip Flexors

 This is a great way to relax your hip flexors after a tough bike ride
How to do it:
- Put a foam roller on the ground and lie on top of it.
- Roll forwards and backwards to gently massage your hip flexors.
The Hamstrings

 You can also use a foam roller to massage your hamstrings
How to do it:
- Sit on a mat on the ground with your knees bent. Put the foam roller under your knees.
- With your arms behind you, raise your butt off the floor and roll the foam roller around under one thigh. Keep the other leg bent with your foot on the floor to maintain your balance.
Repeat on both sides, of course.
Final Notes on Exercises and Stretches for Piriformis Syndrome in Cyclists
- Frequency: Do stretches daily and strengthening exercises 3 to 4 times per week.
- Progression: Once pain-free, get a proper bike fit adjustment to avoid recurrence. It is vital to make sure that your bike and your saddle are a perfect fit for your body.
- Resuming Cycling: Then you can gradually reintroduce cycling. See our detailed post: A Step-by-step Guide to Returning to Cycling After Severe Piriformis Syndrome.
- Balance: Continue a mix of strength and flexibility training to maintain muscle balance. Something like yoga is a good balance for all the repetitive actions in cycling.

 Yoga is a great way to keep your body in balance and avoid injury
This plan will help you return to cycling more strongly and prevent future flare-ups of Piriformis Syndrome. Happy cycling!
| |
| |
Check Out Our Most Popular Posts! | ||
| ||
Did you enjoy this post or find it helpful? If so, please support our blog! We write this blog because we love cycling. But we also need to earn a living, so we would appreciate it very much if you click through to one of our reputable affiliates for your online shopping. We are proudly affiliated with Amazon, which sells pretty much everything, and has outstanding shipping and return policies. When you buy from our affiliates we make a small commission, and this is the only way we earn any income. Plus, it costs you nothing at all - a real win/win situation! We here at Average Joe Cyclist do not receive any information AT ALL about who you are, where you live, or what your dog's name is. Buying through our Amazon links is simply an anonymous way to thank us for our efforts, like tossing a few coins in a tip jar. Except that it is Amazon who tosses the coins, not you! | ||
")


")
")


")
")
")

")


")
")


")


Leave a Reply